Volunteer Badges for Role Clarity That Makes Events Run Better
Why volunteer badges reduce confusion at busy events
When an event gets busy, most problems aren’t complicated—they’re time-sensitive. Someone needs directions, a line needs to move, a vendor needs power, or a guest needs medical help. In those moments, volunteer badges turn searching and guessing into a quick, confident handoff. A clear role label (like “INFO,” “MEDICAL,” or “STAGE CREW”) lets attendees and staff identify the right person at a glance. That matters when venues are unfamiliar, schedules shift, or crowds surge and everyone is trying to solve something at once. Instead of interrupting multiple volunteers to find the “right” one, people can go directly to the role they need. Role clarity is also a big deal for volunteers themselves. When expectations are clearer, volunteers tend to feel more supported and coordinated—both of which influence how smoothly the work goes and how positive the experience feels. That connection between clarity, support, and volunteer experience is discussed in volunteer management research (source). Badges don’t replace training, but they reinforce it in the moment: “This is what I do, and this is who should come to me.”
- Fewer interruptions: volunteers don’t get stopped for issues outside their scope
- Faster decisions: the right role is visible without a conversation
- Smoother coordination: staff can route questions, supplies, and updates more efficiently
- Calmer crowd experience: attendees feel guided instead of bounced between people
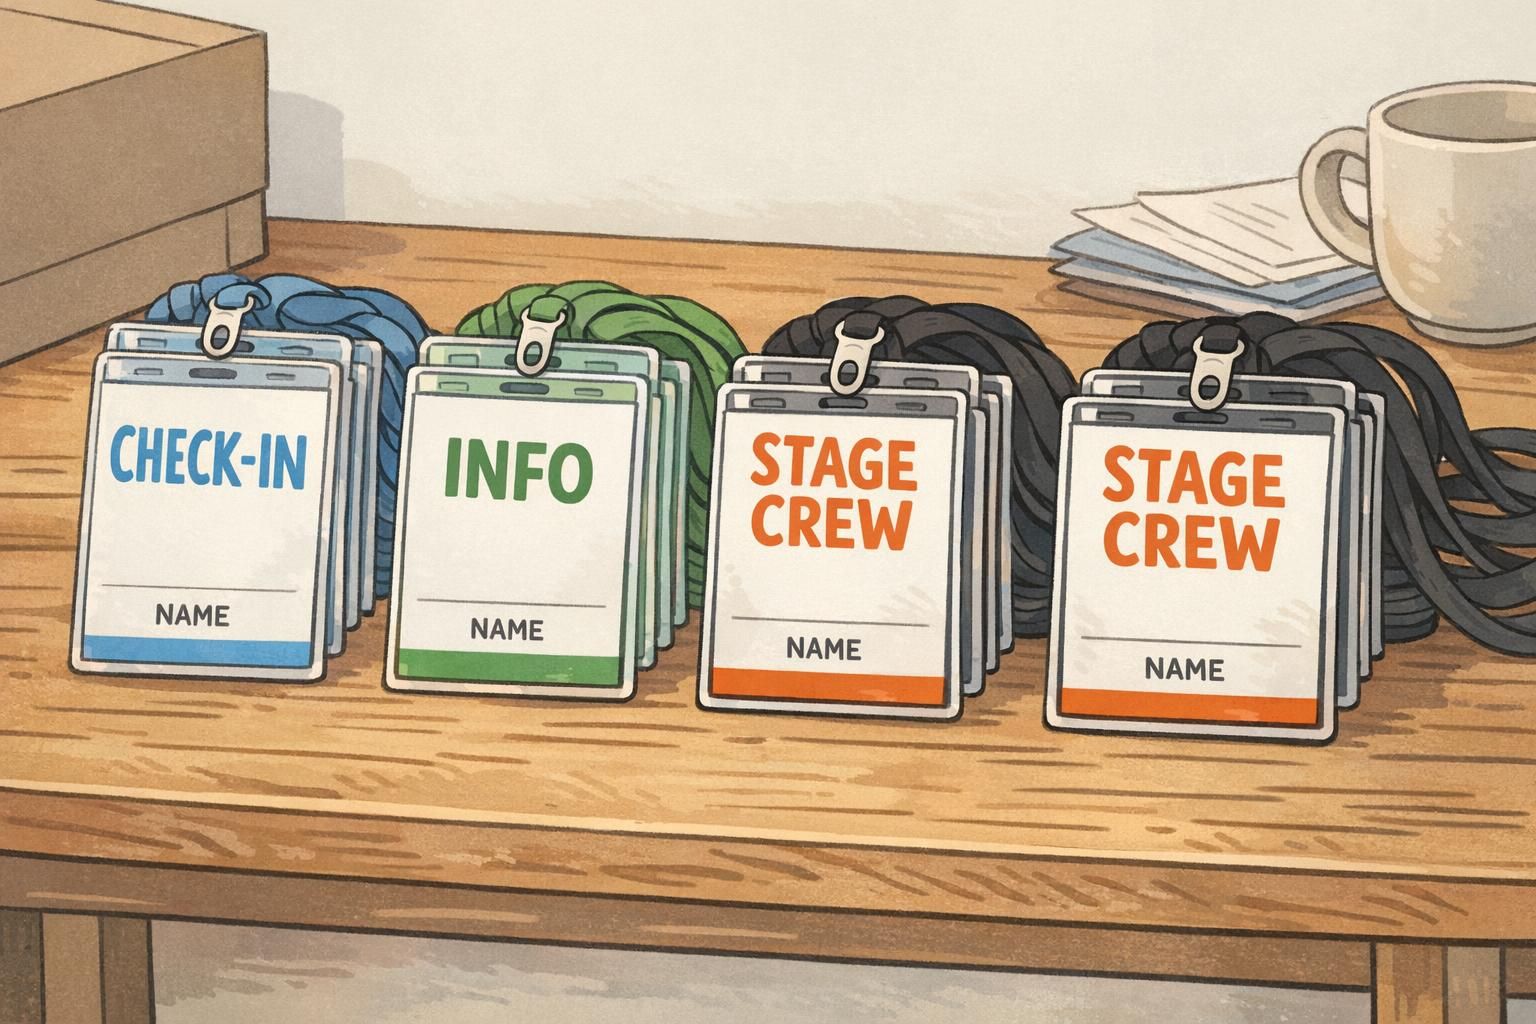
Role clarity basics: what should be on a badge (and what can wait)
If you want role clarity, design for distance. People should be able to read the most important information from several feet away—while walking, while holding a bag, or while standing in a line. A practical rule: prioritize the role title first, then the person’s name, then any optional context. If the badge has too many extras, the key details shrink—and the role identifier stops doing its job.
- Role title (largest text): the main role identifier (e.g., “CHECK-IN,” “INFO,” “MEDICAL”)
- Name (medium text): helps with friendly interactions and accountability
- Optional team or zone (small text): adds location context (e.g., “ZONE B” or “OPS TEAM”)
If you’re deciding between adding more details or making the role bigger: make the role bigger. At busy events, the role label solves more problems than any extra line of text.
Add them only if you can keep the role title large and readable. If the role shrinks or gets visually crowded, those details can wait for other materials (like volunteer guides or staff-only directories).
For many volunteer programs, role clarity matters more than photos. If you do include photos, keep the role title dominant so attendees can still find help quickly.
Simple role sets that cover most events (ready-to-copy templates)
The easiest way to reduce confusion is to keep roles tight and mapped to real attendee needs. If roles overlap (“Support,” “Help,” “Runner,” “General”), people hesitate because they can’t tell who owns the issue. Start with a small core set and expand only when you can clearly explain the difference during orientation. A clean role system also makes it easier to set up an event volunteer ID workflow: fewer templates, fewer printing variations, and fewer “Which badge do I give you?” moments at check-in.
- INFO DESK
- CHECK-IN
- FLOOR SUPPORT
- LOGISTICS
- STAGE CREW
- SECURITY LIAISON
- MEDICAL
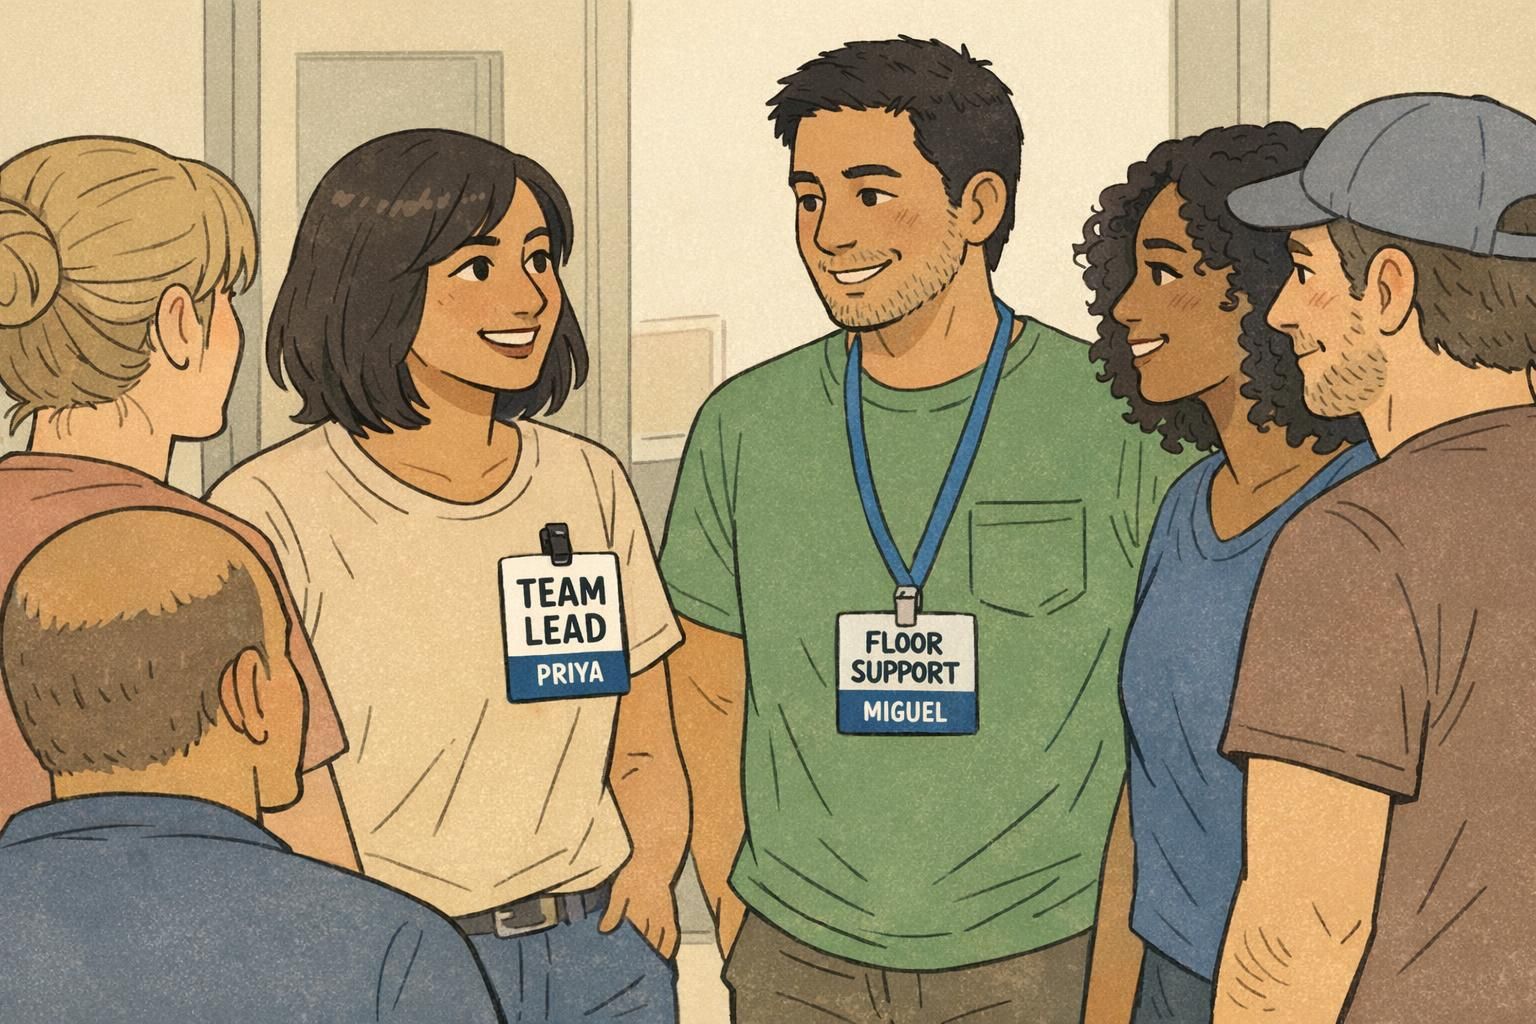
Then add hierarchy labels where they truly change how people should interact with the volunteer. The goal is to show scope (what you handle) and level (what you can decide) without needing a conversation.
- TEAM LEAD
- COORDINATOR
- SUPERVISOR
- TRAINEE
“We reduced our role list and made the role text bigger. The biggest change was how much faster volunteers could point attendees to the right place without leaving their post.” – Event Operations Coordinator
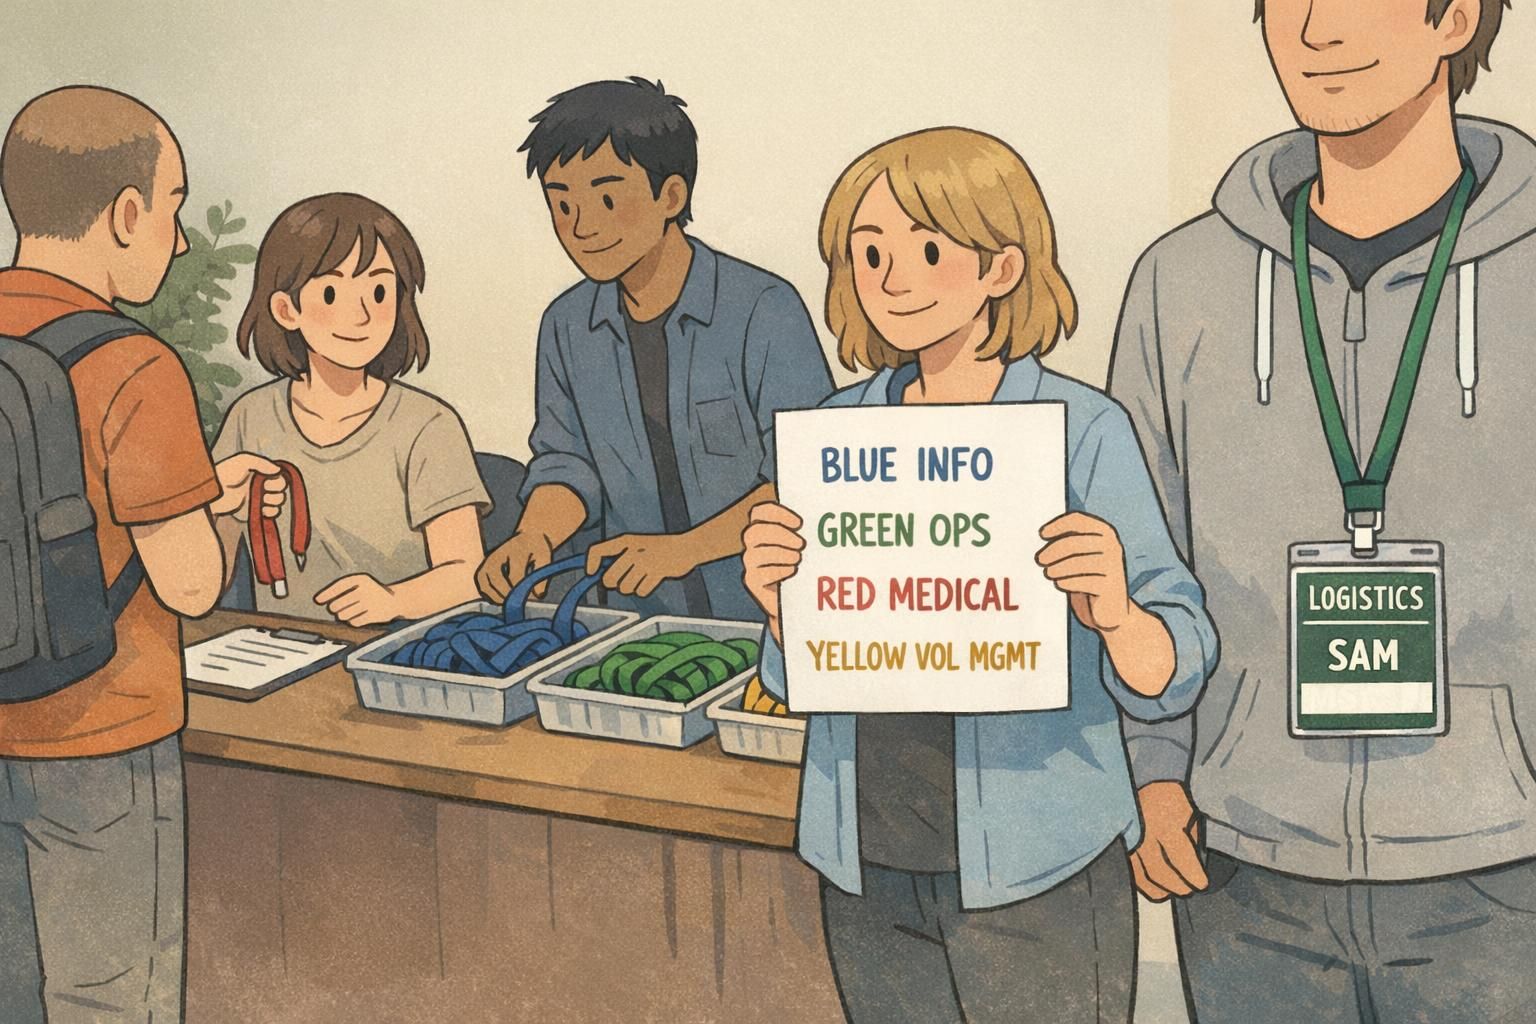
Color-coding that stays consistent (and accessible) across the venue
Color-coding works when it behaves like a simple language: one color equals one function, everywhere. If blue means Info in one room but means Operations on day two, recognition breaks down. A reliable system pairs color with high-contrast text so the badge is readable even in mixed lighting. To improve accessibility, don’t rely on color alone—pair it with a simple icon or shape (for example, a plus sign for Medical, a question mark for Info, a gear for Ops).
- Pick one color per function (not per person) and keep it consistent across rooms and days
- Use high-contrast text (dark text on light backgrounds or vice versa)
- Add an icon or shape to support color-blind accessibility
- Post a one-page legend at volunteer check-in and in staff-only areas
If you only do one thing for fast recognition: keep the same role color across the whole venue. Consistency beats complexity.
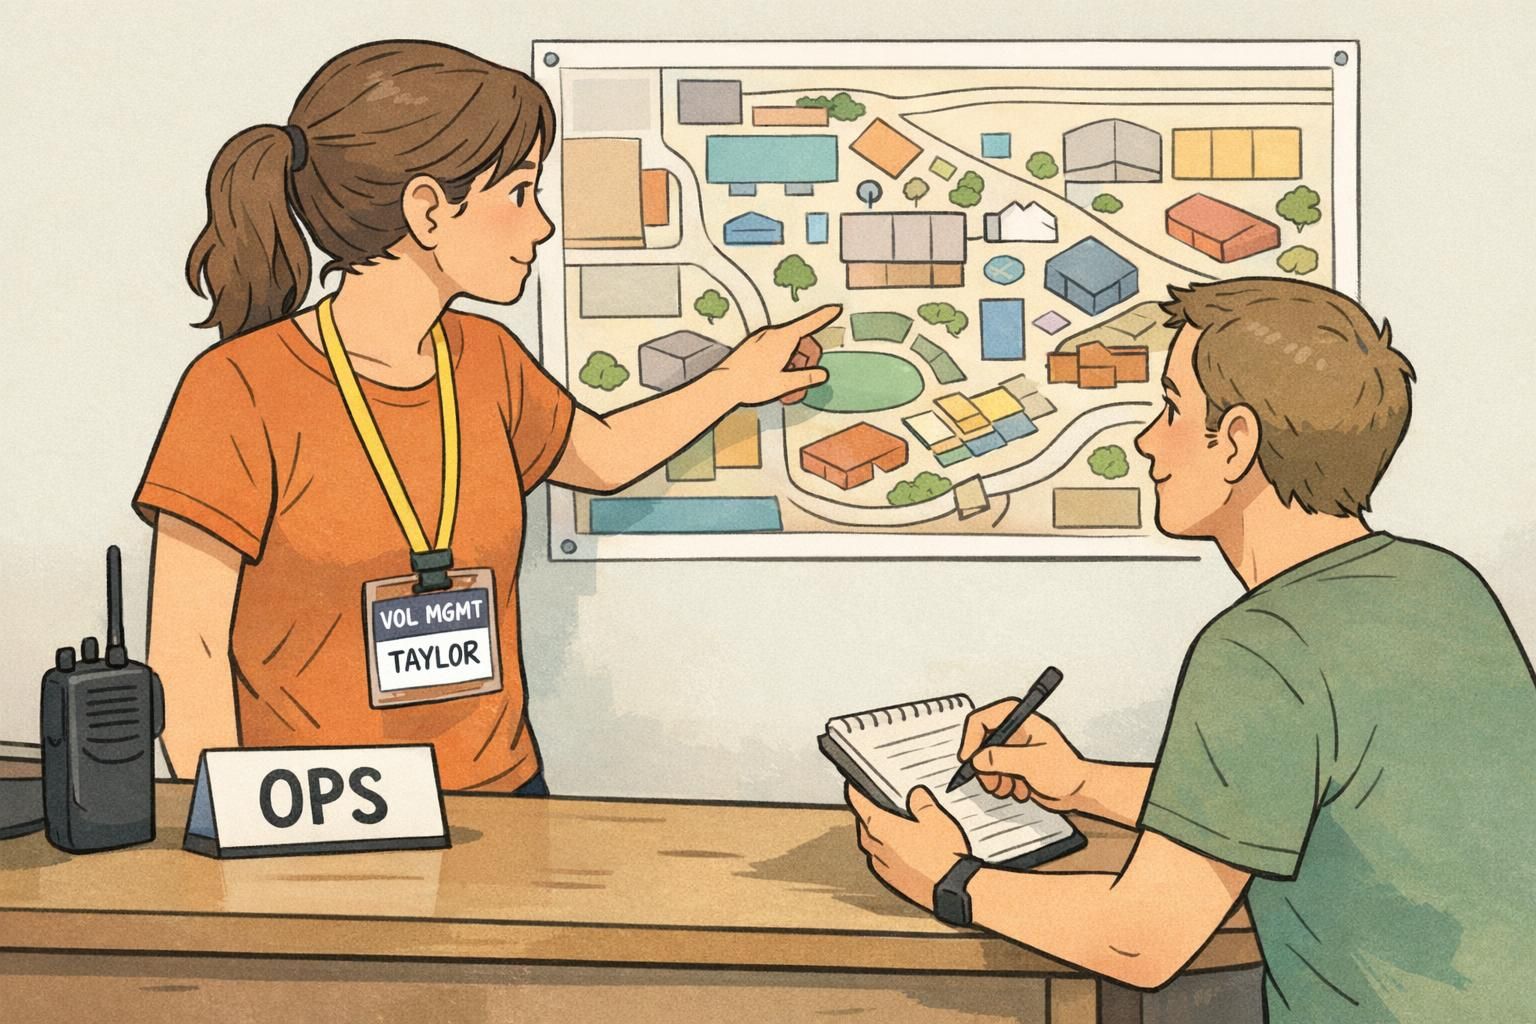
Match event volunteer ID to real permissions and escalation paths
An event volunteer ID works best when it reflects what the volunteer is actually authorized to do. If someone’s badge says “SECURITY LIAISON,” attendees and staff will assume that person can make certain calls—or at least get to the right decision-maker quickly. This is where a small, well-chosen line of text can reduce hesitation. For example, a discreet “REPORTS TO: ZONE LEAD” gives volunteers and staff a clear escalation path when something feels time-sensitive. If your event uses radios or comms, including a radio channel can speed up coordination—especially for Logistics, Floor Support, or Volunteer Management. Keep it small so it doesn’t compete with the role identifier.
- Ensure each role label matches training and real duties
- Make escalation obvious (who to call or who to report to)
- Use small-print comms info only if it’s actively used
- Avoid titles that imply authority the volunteer doesn’t have
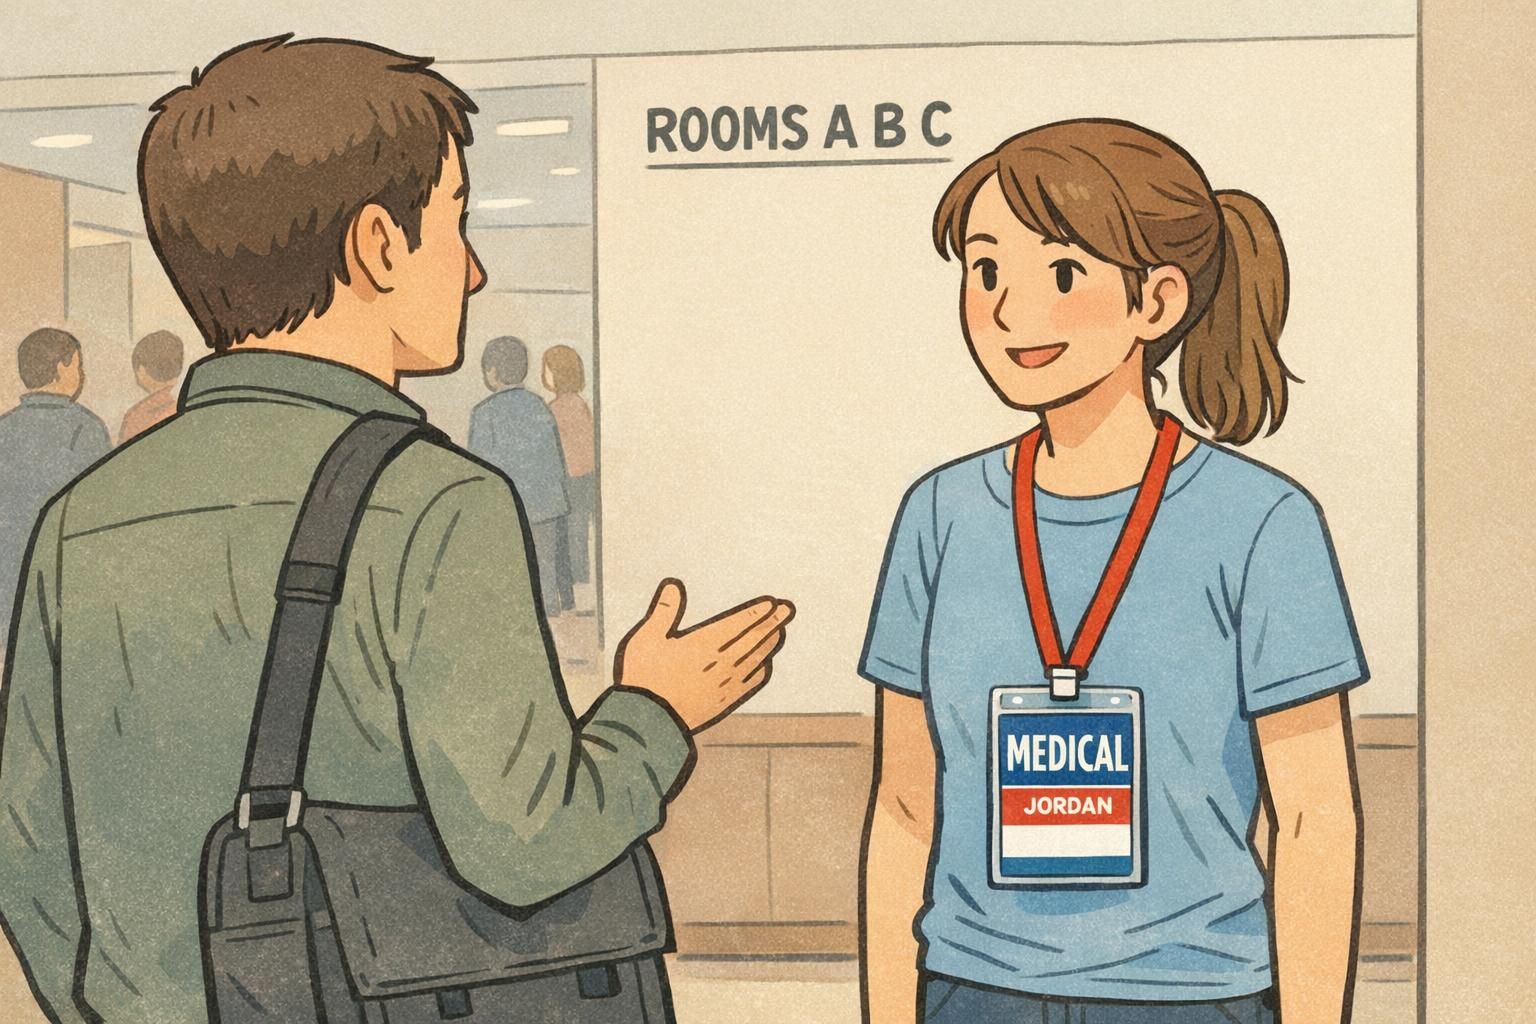
Where a role identifier matters most: check-in, crowd flow, and safety
Some locations create predictable pressure points: entrances, registration lines, information tables, main corridors, and transitions between sessions. In these areas, a prominent role identifier reduces bottlenecks because people don’t need to ask multiple questions to find help. Safety-related roles deserve extra attention. A “MEDICAL” or “SAFETY MARSHAL” label should be visually distinct, high-contrast, and easy to spot in a hurry. In large venues, adding a zone label (like “ZONE B”) can prevent wandering and reduce the time it takes to get the right help to the right place.
- Entrances and check-in: roles need to be readable while people are moving
- High-traffic corridors: quick directions prevent crowding
- Stage and back-of-house transitions: clear roles reduce unauthorized entry and confusion
- Safety response: medical and safety roles should be unmistakable
Not always. Zones help most when the venue is large, multi-building, or has repeated “Where is…?” questions that slow volunteers down.
Use clear, calm design: high-contrast text, consistent color, and a simple icon. The goal is easy recognition, not urgency.
Badge format choices: lanyards, clips, holders, and event badge sizes
The best badge design can still fail if it’s hard to wear or hard to see. Match the format to the environment and the job. Lanyards are a common default because they keep badges visible, centered, and easy to scan. Clips can be a better fit for active roles moving equipment, where a lanyard might swing or get in the way. Clear holders add durability for outdoor events, multi-day conferences, or any situation with rain, dust, or frequent handling. Size matters, too. If volunteers need to be recognized from a distance—like at festivals, fairs, or sports venues—larger event badge formats give you room for a big role title without cramming.
- Lanyards: strong visibility and easy recognition in crowds
- Clips: stable and practical for hands-on or equipment-moving roles
- Plastic holders: protect printed badges for outdoor or multi-day use
- Larger badge sizes: better distance readability for big venues
Consistency helps more than novelty. When badges share the same layout and wear style, volunteers switching stations still look familiar and easy to identify.
Products that fit role-based volunteer programs (and how to order efficiently)
Role-based programs are easier to run when you standardize templates and print in batches by role and day. That way, volunteer check-in becomes a simple sorting task: find the right stack, confirm the name, and hand it off. Event badges and durable ID badges both work well for role clarity when they use a clear role header, consistent colors, and the same layout across the team. If you’re building a repeatable system, it can help to keep one shared “role legend” and a simple approval step so the final print matches your staffing plan. If you’re sourcing badges, it’s also useful to know whether a supplier can support small role changes without forcing you into large quantities. BadgeZoo has no minimum order quantity, which can be handy when you’re adjusting role counts late in planning or piloting a new badge system for a smaller event. For role-labeled teams, you can explore custom event badges for role-labeled volunteer teams and standardize a few templates that you reuse each time.
- Create one template per role (plus a lead/trainee variant if needed)
- Print and sort by role first, then alphabetize names within each role
- Use consistent lanyard colors that match your legend
- Bring extra blanks or a small “floater” batch for last-minute adds
Quick implementation checklist (before you print)
A good badge system is mostly about making a few decisions early—and then sticking to them. Before you print, do a fast check that your wording, colors, and roles match how your event actually runs on the ground.
- Finalize the role list (keep it small and mapped to attendee needs)
- Confirm hierarchy labels (TEAM LEAD, COORDINATOR, TRAINEE) and what each one means
- Assign one consistent color per function and write a simple legend
- Test readability from several feet away (role title first, then name)
- Verify roles match training materials and any digital permissions or tools
- Pilot at volunteer check-in: note confusion points and adjust wording before full production
- Prepare an escalation path: who each role reports to and how they get help quickly
The strongest systems are easy to learn in five minutes. If a new volunteer can glance at a badge and understand who does what, attendees will too.