Camp Name Tags for Youth Events and Camps: Safer, Tougher Badge Systems
Why camp name tags matter for safer youth programs
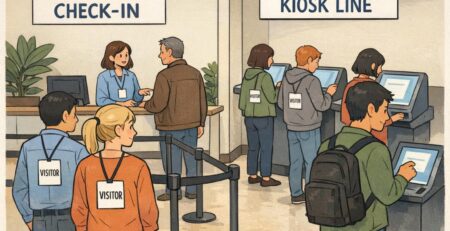
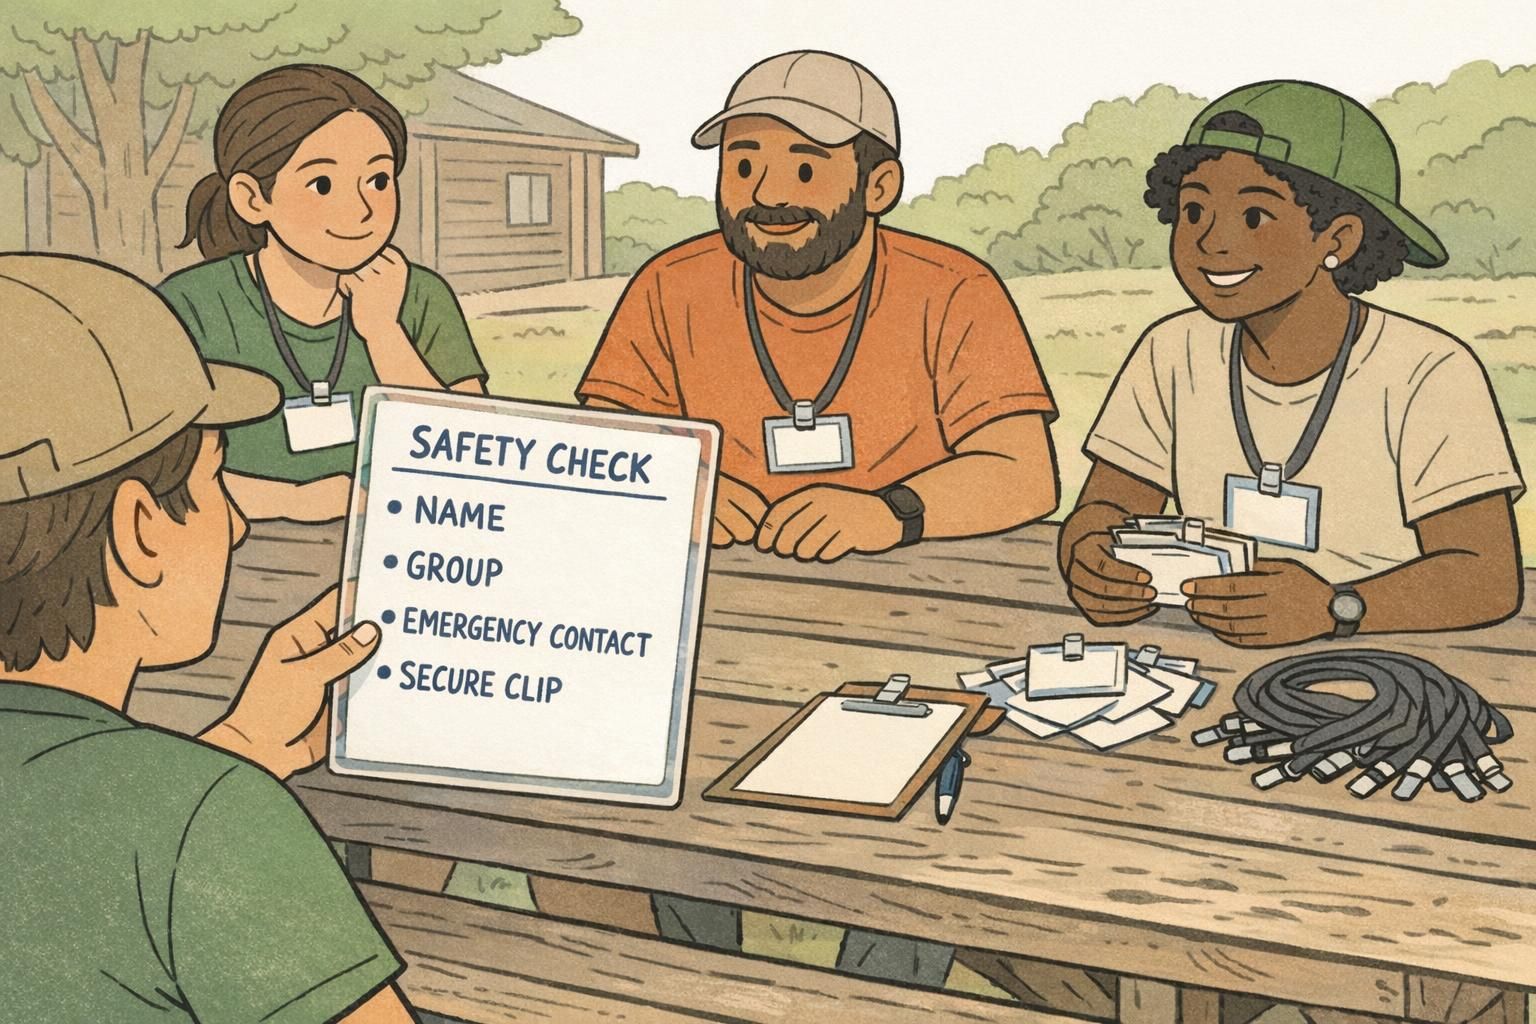
Camp days move fast: check-in lines, rotating activities, and groups that blend at meals, swim tests, or rainy-day indoor options. In that pace, camp name tags do more than help people learn names—they help staff confirm who a participant is, which group they belong to, and where they should be next.
When identification stays readable in real conditions (sweat, sunscreen, water, dirt, and constant motion), it supports safer supervision: quicker headcounts, smoother transitions, and fewer “wait—are you in Oaks or Pines?” moments. It also helps new or rotating staff jump in confidently, because they can rely on consistent visual cues instead of memory.
In youth programs, a “tough” ID system is a safety system: it keeps names, groups, and emergency details readable and attached all day—so the right adults can respond quickly when it matters.
- Faster check-in and reduced line confusion when every badge uses the same layout
- Clear group assignment for transitions (cabin, team, age band, or schedule track)
- More reliable headcounts because the badge stays on and stays legible
- Quicker help in urgent moments when emergency contact info is consistent and glanceable
- Smoother pickup because staff can verify the right child and the right pickup status
Common weak points in youth identification (and what to improve)
Most breakdowns in youth identification come from predictable weak points: ink that smears, paper that tears, and badges that crack at the clip after one active day. Even when the badge survives, the printing can fade or become unreadable—turning a helpful tool into a blank piece of plastic.
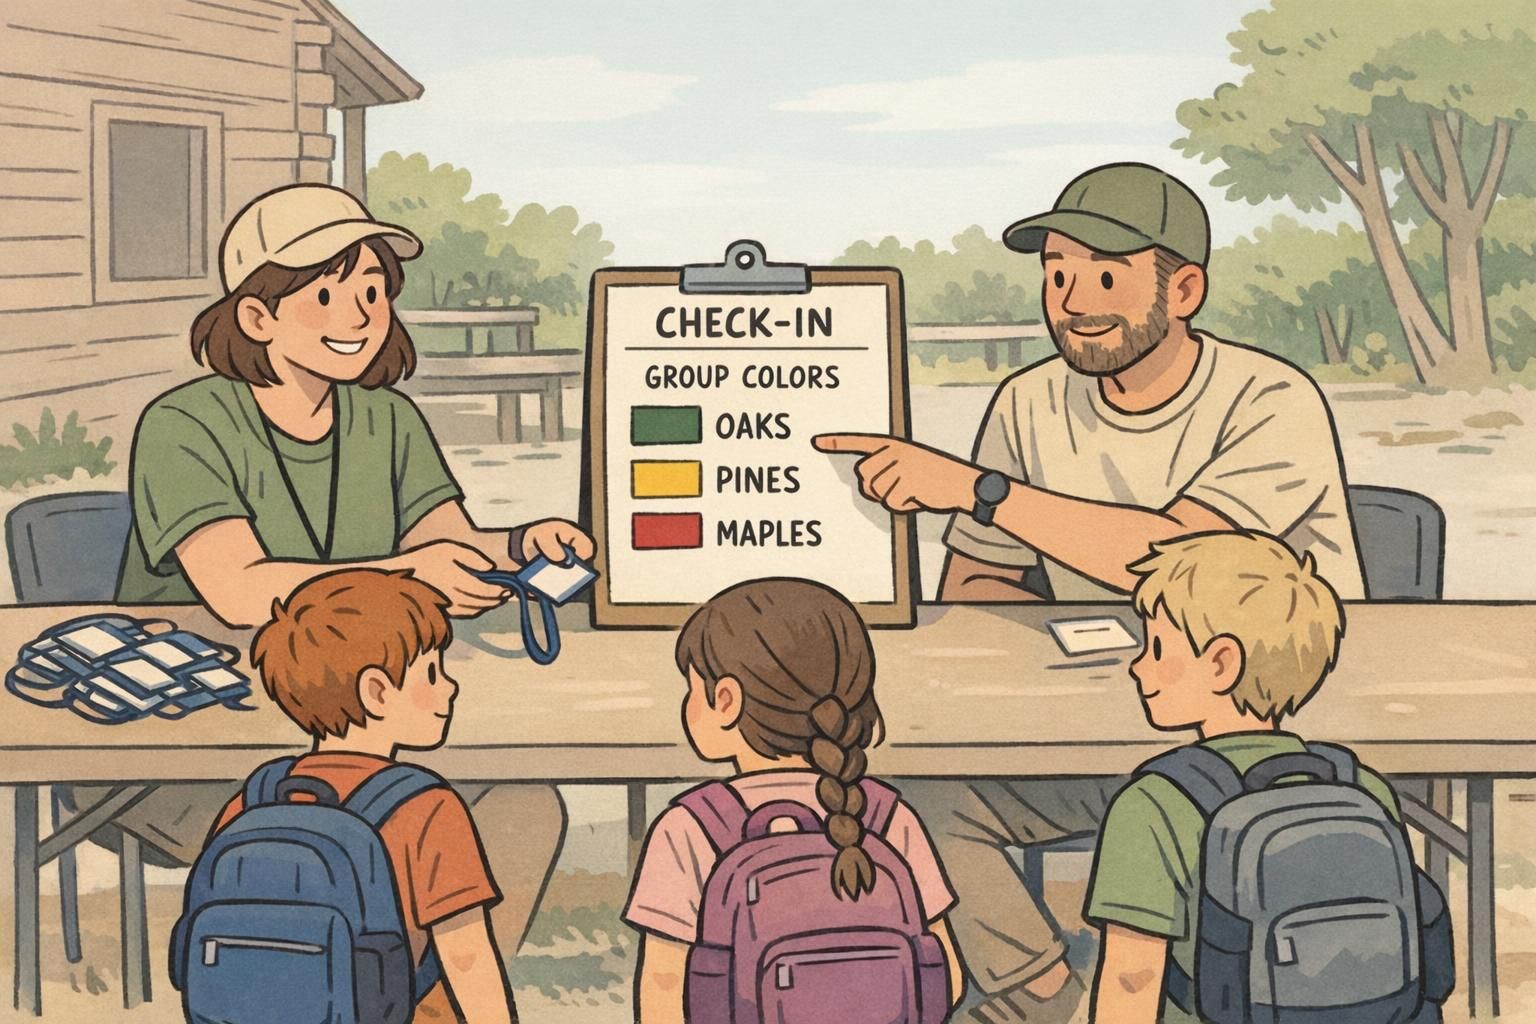
Another common gap is inconsistent group labeling. If one cabin is labeled with a mascot, another with a color, and a third with a handwritten note, roll call and pickup slow down. Staff waste time asking follow-up questions instead of confidently guiding kids to the right place.
A tougher approach treats readability and durability as features you plan for: large type, high contrast, secure attachment, and materials that match the environment. The goal is simple: youth event IDs and student badges that stay on, stay legible, and stay accurate through the full schedule.
- Smearing or fading names: switch to water-resistant printing and protect the surface with a holder
- Cracked corners and torn holes: use thicker stock or PVC cards and choose hole placement that matches the clip
- Badges that flip or hide: choose vertical holders and keep the layout readable even when partially covered
- Tangling or snag hazards: pick attachments intentionally (clips or breakaway lanyards where appropriate)
- Group confusion: standardize group labels with redundant cues (text + color bar) across every badge
They can work for very short, low-activity events, but they often smear with sweat and water and peel off during active play. For multi-day camps or water-heavy schedules, a more durable badge setup reduces rework and mix-ups.
Groups. Staff can often recognize a child’s face, but they still need to know the correct cabin/team and where that group is scheduled to be. Clear group labeling reduces the follow-up questions that slow transitions.
Durability-first materials and construction for camp and outdoor use
Durability starts with choosing materials that behave well outdoors. For many camps, that means moving from thin paper or cardstock to thicker stock with protection—or directly to plastic ID cards. Pair the card with a protective holder so the printed surface is shielded from abrasion, repeated bending, and moisture.
Think about how badges fail in your setting: do they get soaked at the waterfront, scraped during field games, or bent during climbing harness checks? Once you identify the “failure mode,” you can match the construction to the activity level.
- Card material: thicker stock with protection for short programs, or PVC-style cards for multi-day durability and wipe-clean use
- Protection: clear holders reduce smearing and scratches and help cards survive repeated handling
- Edges and corners: rounded corners snag less and reduce cracking over time
- Attachment choice: clips often suit staff and leaders; breakaway lanyards may be considered where appropriate for participants to reduce snag hazards
- Water-heavy contexts: consider wristband-style solutions if badges are regularly submerged or if lanyards are impractical
- Re-use plan: choose cards and holders that can be wiped clean and stored for next season
For multi-day camps, build a small replacement process so a lost badge doesn’t become a safety and logistics problem. A simple “replacement kit” can include blank cards (or a fast reprint method), spare holders, and a clear rule for invalidating the old badge so staff aren’t guessing which one is current.
“Durability isn’t just about saving money on reprints—it’s about keeping the right information visible for the entire day, even when kids are wet, tired, and moving fast.” – Program Director
Emergency contact options that are fast to read (without clutter)
In youth settings, the best emergency info is the kind staff can use instantly. The goal is not to cram every detail onto a badge—it’s to make the highest-value items large, high-contrast, and consistently placed so any adult knows exactly where to look.
A practical rule is “glanceable in three seconds.” Under pressure, staff should be able to find: the participant’s name, their group, and the emergency contact. If your program uses pickup procedures, a pickup code or pickup status indicator can also be helpful—kept simple and placed predictably.
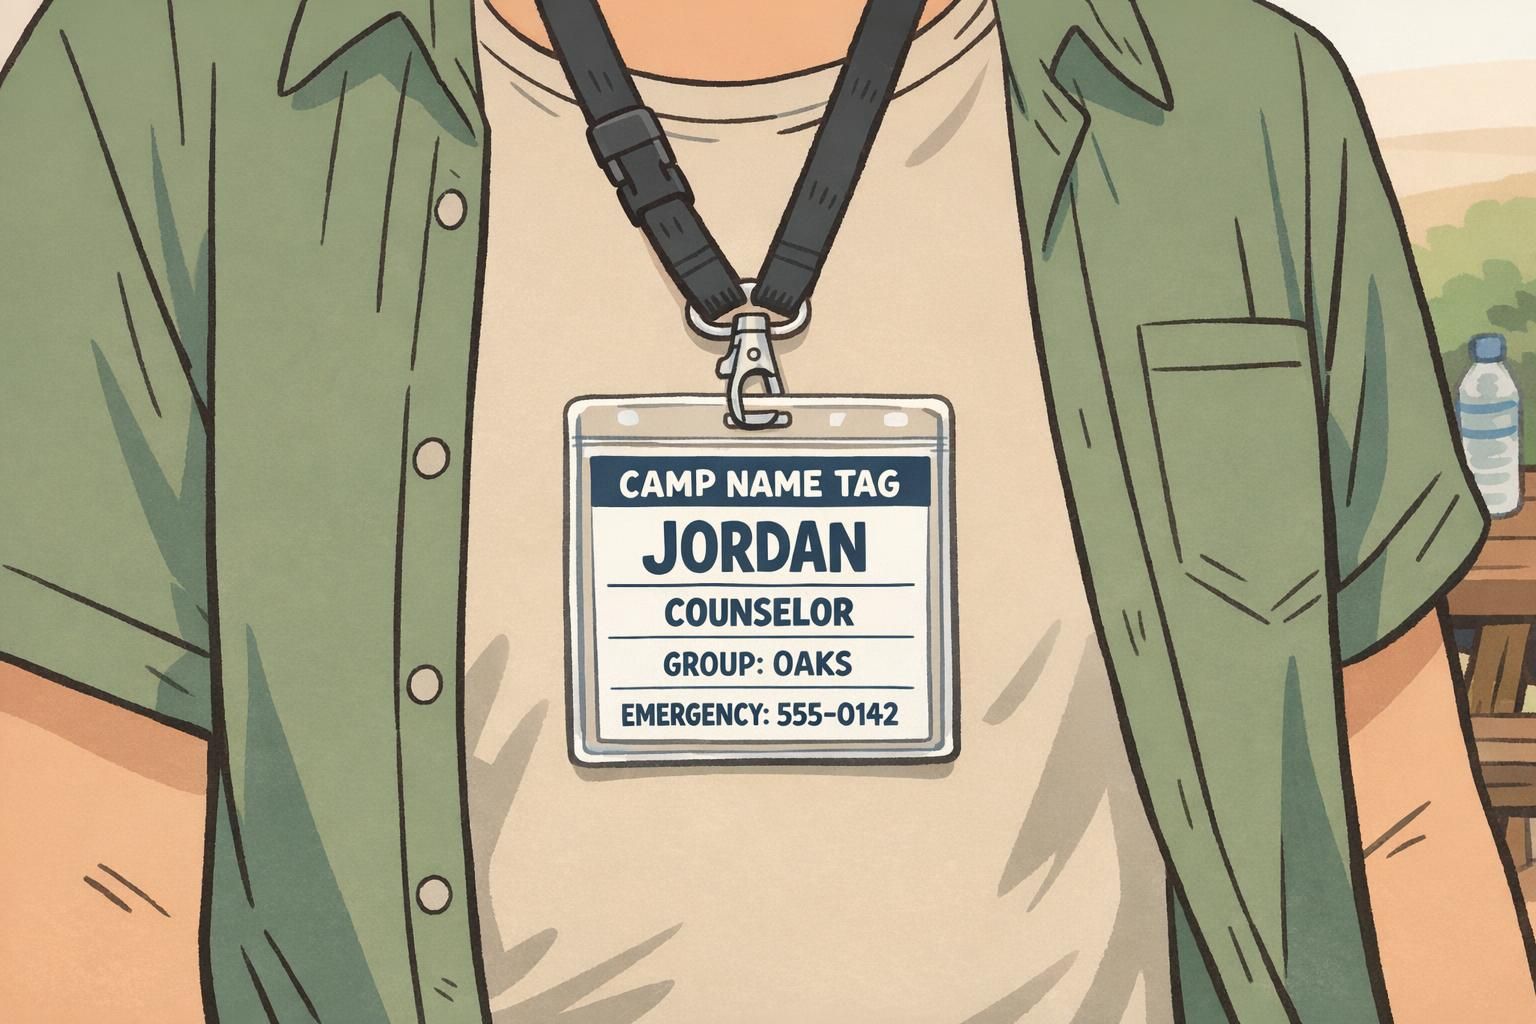
- Front of badge (largest): Participant first name (or preferred name) in big, bold type
- Front of badge (next): Group label (e.g., OAKS) with a color bar plus text
- Bottom band or back: Emergency phone number in large, easy-to-scan digits
- Optional: Pickup code/status indicator if your program uses one
- Critical notes only when needed and when aligned with your organization’s policies (kept short and consistently located)
Consistency is a safety feature. When every badge puts emergency info in the same place, any staff member—new, rotating, or responding quickly—can find it without hesitation.
Either can work, but keep placement consistent across all badges. Many programs prefer a bottom band on the front or a dedicated area on the back so staff know exactly where to look every time.
Prioritize the top three: name, group, emergency phone. Add only the next most actionable item your staff uses in real situations (like pickup status). Everything else should be secondary or handled through your internal roster.
Group labeling that scales: colors, roles, and zones for youth event IDs
When you scale from one cabin to many groups across multiple activities, group labeling becomes the difference between smooth movement and constant bottlenecks. Strong youth event IDs make group assignment obvious at arm’s length—without requiring staff to stop, ask, and confirm.
Use redundant cues: color plus text. Color helps at a glance, while text still works in low light, for color-vision differences, or when part of the badge is covered by a jacket or rain shell. Keep the hierarchy consistent so the most important items stay the biggest: name, group, then role (when applicable).
- Group name in large text (e.g., OAKS) rather than abbreviations that new staff may not know
- A bold color bar associated with that group, repeated on signage and schedules
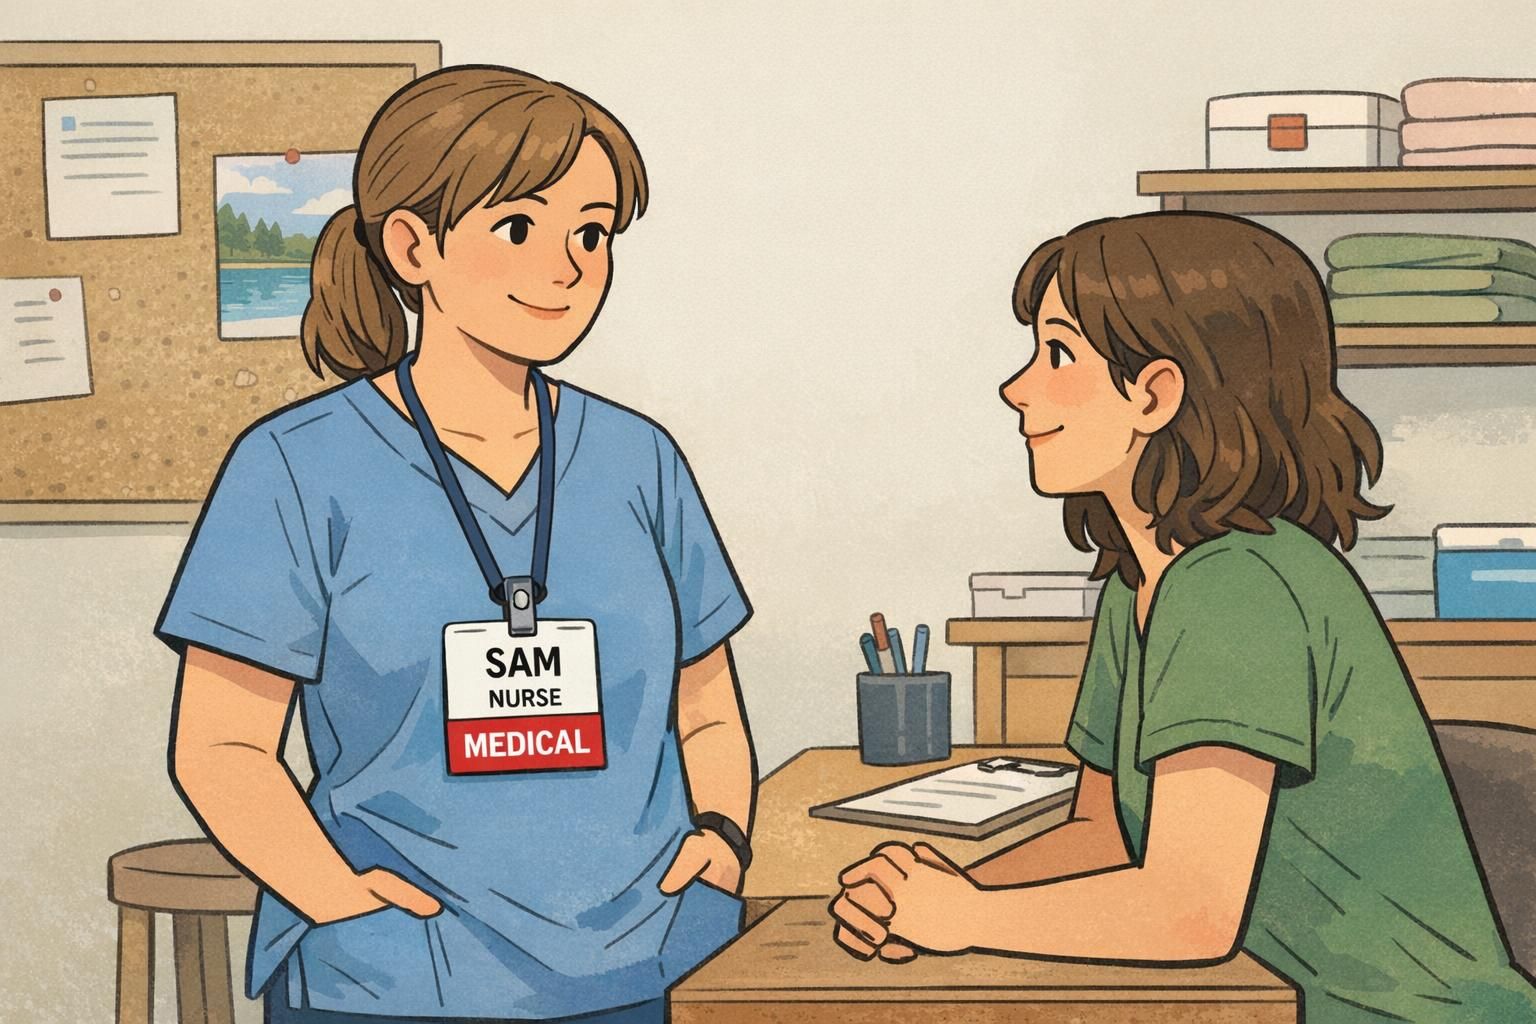
- Role markers for adults (Counselor, Volunteer, Nurse, Security) so parents and youth can find the right help quickly
- Optional zone icons (waterfront, dining hall, climbing wall) for routing and supervision—kept simple and consistent

For camps that also run school-year programs, this same system translates well to student badges: the same idea of high-contrast names, consistent group identifiers, and clearly marked adult roles. The format can stay familiar while the labels change (grade band, homeroom, bus group, or after-school track).
Safety accessories that support a tougher system (holders, clips, and add-ons)
Accessories are where a “good looking badge” becomes a “badge that actually survives camp.” A sturdy holder protects printed information from water and abrasion. A secure clip reduces loss when kids are running, climbing, or changing layers. And where appropriate, breakaway lanyards can reduce snag hazards by separating under tension.
For staff and key roles, a badge buddy can add instant visual recognition without changing the main ID layout. A rigid badge buddy is typically the same width as the ID badge, slightly taller, and clipped together with the ID badge using the same top clip—forming one straight vertical stack. It’s especially useful for roles where speed matters (for example, quickly spotting “MEDICAL” during an incident).
- Clear badge holders: protect names and emergency info from smears, scratches, and rain
- Secure clips: reduce lost badges during high movement and repeated gear changes
- Breakaway lanyards (when appropriate): can reduce snag hazards while keeping IDs visible
- Badge buddies for staff roles: add an immediate role flag without cluttering the main ID card
- Simple add-ons only: choose accessories that reinforce safe routines—visibility, secure attachment, quick role recognition
If an accessory makes IDs harder to keep visible or more likely to snag, it’s working against you. The best add-ons make the badge easier to see, easier to keep attached, and easier to interpret quickly.
Designing “safer, tougher” badge systems with tiered challenges and safe behaviors
A “tougher” badge system doesn’t have to mean encouraging bigger risks. In youth programs, tougher can mean more consistent safe habits: buddy checks, hydration routines, equipment inspections, and knowing what to do when something feels unsafe. When access and recognition are linked to safe decision-making, badges reinforce the behaviors you want most.
One practical way to do this is with tiered challenges tied to safety routines. Participants can earn levels by demonstrating skills and knowledge that staff can observe. For older youth leaders, co-designing the criteria helps it feel fair and motivating. Game-like, scenario-based tasks can also make safety learning feel meaningful rather than preachy. Research on co-designed, game-based approaches with adolescents suggests they can improve self-reported safety knowledge and be perceived as both fun and educational—supporting the idea that camps can build tougher badge criteria around safe decision-making rather than risk-taking (source).
- Tier 1 (Foundations): demonstrate knowing your group, meeting point, and how to ask for help
- Tier 2 (Routine safety): show buddy-system check-ins, hydration habits, and gear readiness before activities
- Tier 3 (Scenario skills): short role-plays like “lost and found,” “weather change,” or “someone feels unwell”
- Values-based recognition: Effort, Courage, Supportive Peer—defined as doing the right thing within safety rules, including speaking up
- Co-designed criteria for older youth leaders: invite input, then standardize language so staff can assess consistently
“When kids know what they’re earning and it’s tied to smart choices—like checking gear and staying with a buddy—you get buy-in without rewarding risky behavior.” – Lead Counselor
Product checklist and ordering tips for camps (with a ready-to-link option)
A strong camp identification setup is easier to run when you order and assemble it like a system. That means standard templates, consistent placement of group and emergency info, and a straightforward replacement workflow for lost badges. When check-in is busy, simplicity is what keeps the line moving without sacrificing accuracy.
- Participant camp name tags with: large name, clear group label, and an emergency phone field
- Staff IDs with role identifiers (Counselor, Volunteer, Nurse, Security) for quick routing and response
- Durable holders matched to your environment (water, abrasion, dust, repeated handling)
- Attachment plan: clips and/or breakaway lanyards where appropriate for your participant ages and activities
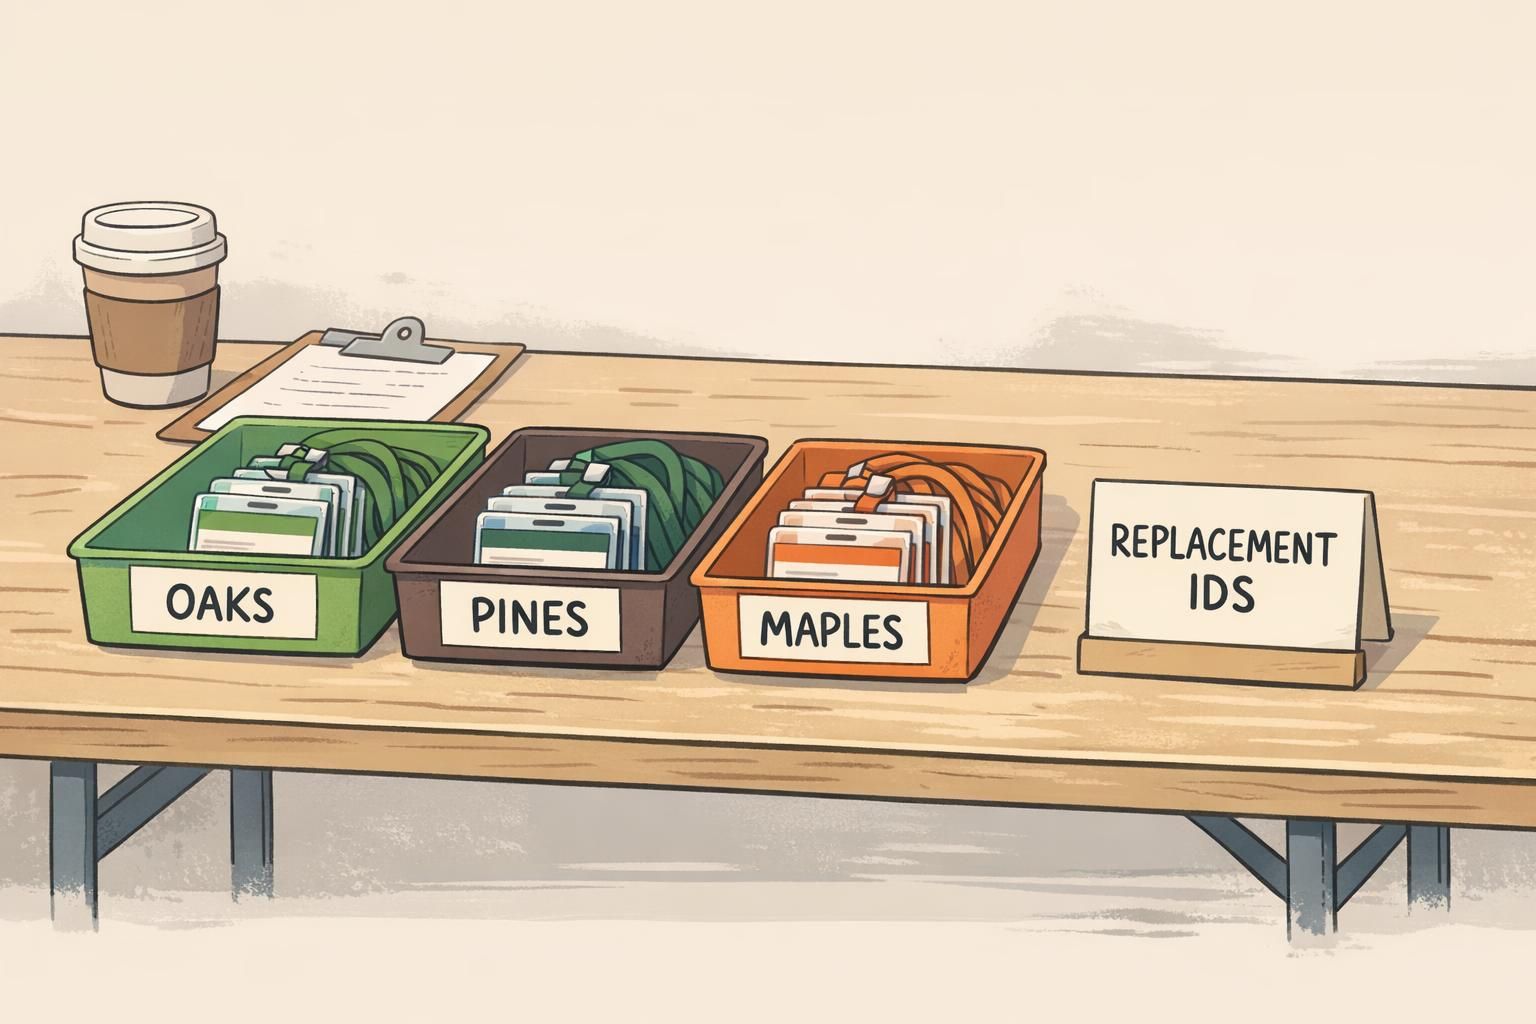
- Sorting system: pre-sort IDs into trays by group color/name to speed distribution
- Replacement workflow: a designated “replacement IDs” station, plus a clear way to mark old IDs as invalid
If you’re moving to plastic cards for better longevity and wipe-clean re-use, consider durable custom ID cards for camp staff and participants that fit standard holders and can be designed with high-contrast group bars and role fields. For ordering flexibility, BadgeZoo has no minimum order quantity, which can help when you need a small batch for a pilot program, a late-added staff team, or a mid-season replacement set.
Use one standardized template and keep group colors/labels consistent. Set up a single replacement station and a simple rule: once a badge is replaced, the old one is no longer valid.
Pre-sort badges by group into clearly labeled trays and use the same group names and colors on your signage, schedules, and badges so staff can direct families without extra explanation.
A safer, tougher system is repeatable: durable materials, consistent layout, clear group labeling, and a replacement process that keeps IDs accurate from day one through the final pickup.