
Color Coded Badges: Design Patterns That Stay Clear
Why color coded badges work (and when they don’t)
In busy workplaces, color coded badges can reduce friction in the small moments that matter: finding the right staff member, routing questions to the correct department, or confirming who belongs in a restricted area. A well-chosen color cue is processed quickly—often faster than reading a line of text—so it can help people orient themselves at a glance.
But color works best as a supportive signal, not the whole message. If someone has to rely on color alone to understand a role or access level, the badge becomes fragile: it can fail under low light, glare, printing variation, or for people with color-vision differences. The goal is simple: use color to speed recognition while keeping the badge understandable through primary identifiers like a name, a role label, and (when appropriate) a photo and organization/site identifier.
The most reliable system treats color as a quick cue layered on top of clear text and consistent layout—not as the only way to decode meaning.
- Color helps most when people make the same decision repeatedly (“Ask IT” vs. “Ask Facilities”).
- Color helps least when categories are too many or too similar (multiple shades of the same hue).
- A badge should still make sense in black-and-white or under harsh lighting—color should be additive.
Where to apply color without hurting contrast
When you add color to a badge, the biggest risk is accidentally reducing readability. Many badge failures aren’t about “wrong” colors—they’re about where color sits relative to key text, photos, and quick-scan elements. The safest approach is to keep important information on a clean, high-contrast field, then place color in predictable zones that don’t compete with the name or role.
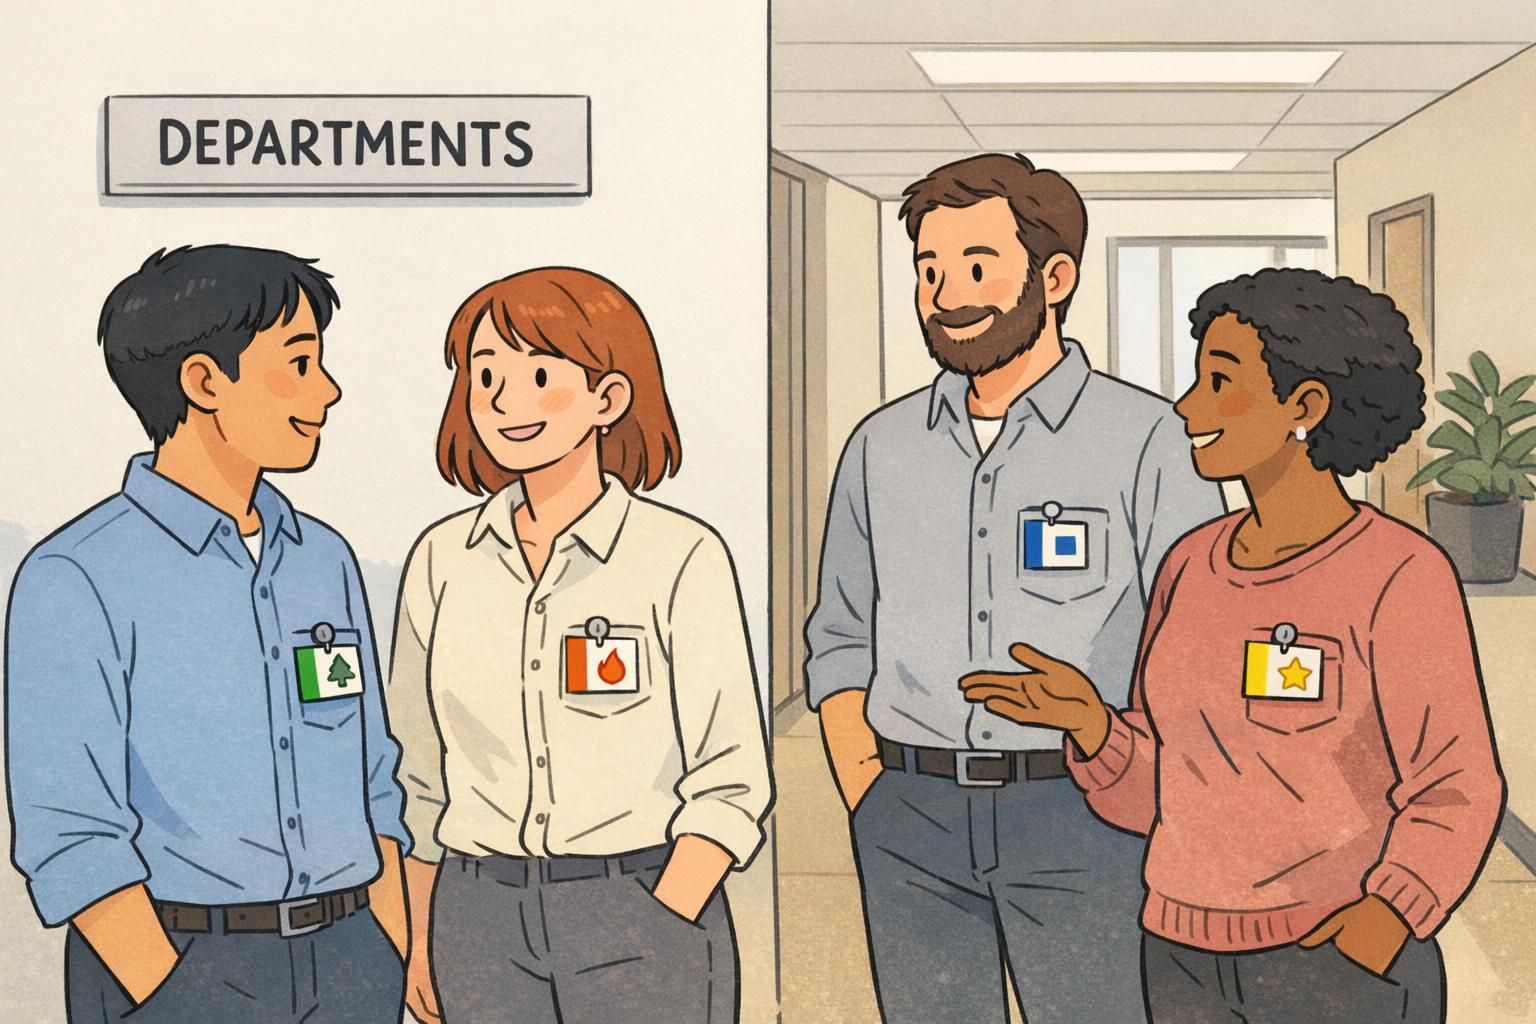
Reliable placements for color cues include a top header bar, a single side stripe, a border, or a dedicated “role band” that’s visually separate from the main name area. These placements are easy to standardize across departments and help keep the badge readable from a few feet away.
- Top header bar: Great for department/role color, easy to spot when badges hang on lanyards.
- Left or right side stripe: Stays visible even when badges sit in holders; keeps the center area clean.
- Border frame: A subtle cue that doesn’t steal space from the name; best when the border is thick enough to notice.
- Dedicated role band: A horizontal band reserved for the role label, separate from the person’s name.
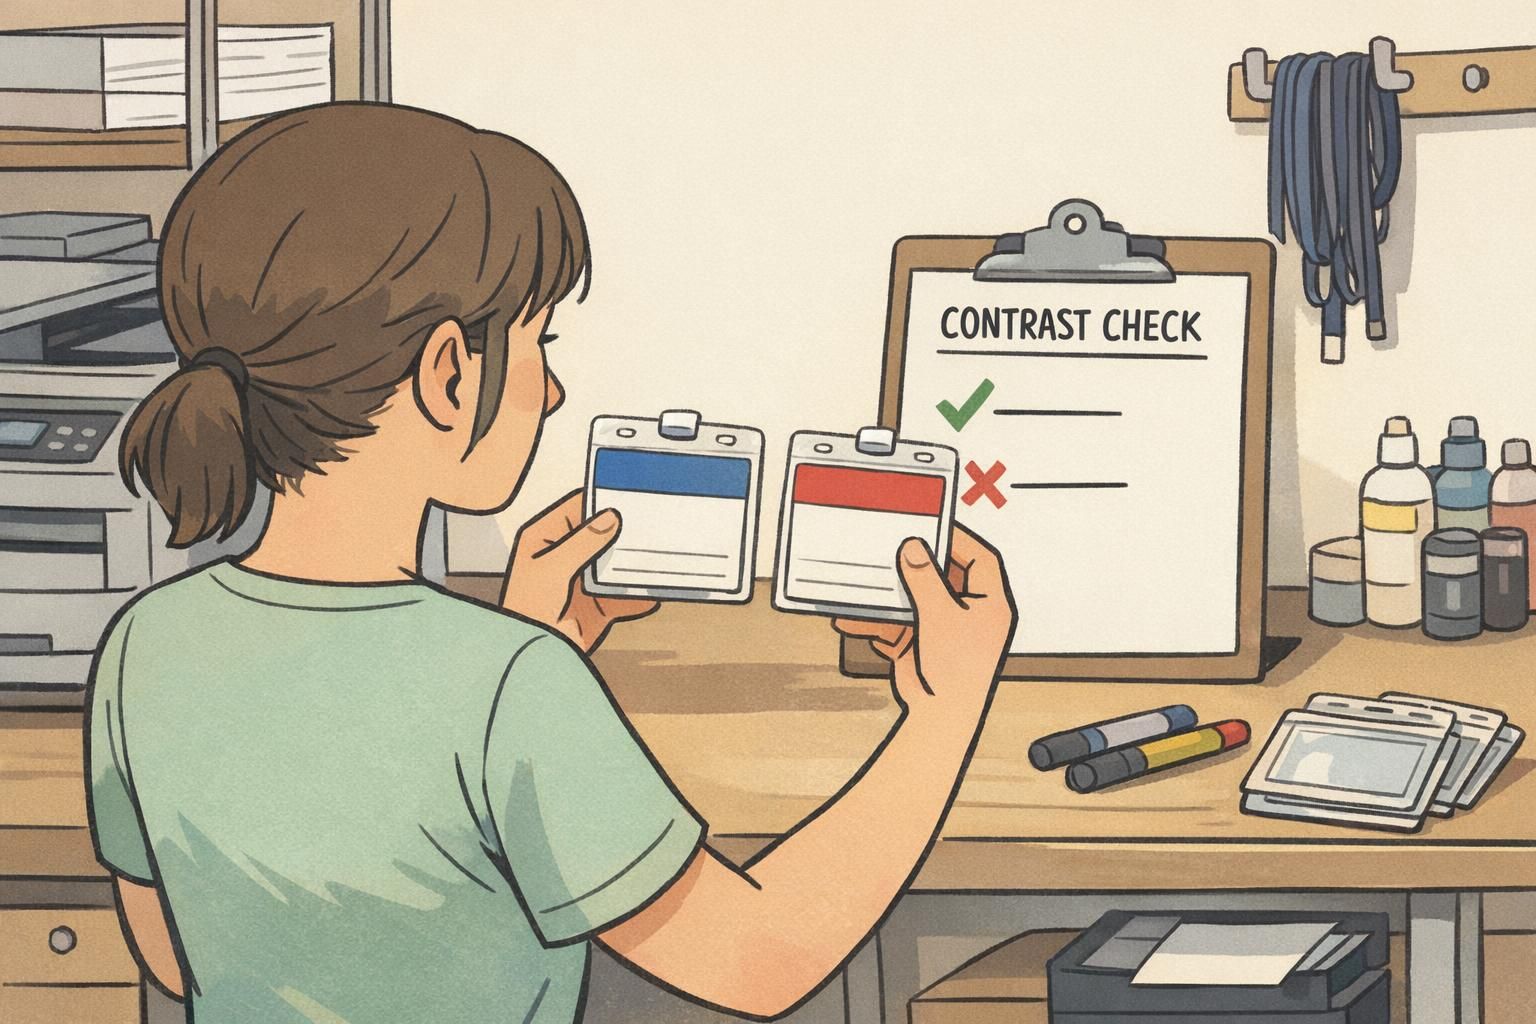
For text, prioritize high contrast: dark text on a light background is the safest default, especially under glare or distance viewing. White text can work, but only when it’s placed on a sufficiently dark color field and kept large enough to read quickly. Avoid mid-tone combinations like medium gray text over a colored band—those are the first to fail once lamination sheen, wear, and ambient lighting come into play.
If you have to squint at the badge from arm’s length, it won’t scan well in a hallway. Keep the name area clean and high-contrast, then use color around it.

Also account for real production conditions. Lamination and glossy finishes can introduce glare; matte/silk finishes can reduce reflections but may slightly soften color intensity. Badges get scratched, handled, and viewed at odd angles. A color cue that looks “subtle” on a monitor may disappear once printed small and placed in a clear holder.
Usually no. Keep the name on a light, high-contrast field whenever possible. If you must place text on a color band, use a very dark band with white text (or a very light band with dark text) and test for glare and distance readability.
It can be, but multiple color zones increase the chance of confusion. One primary color cue (header/stripe/border) plus a small secondary indicator is typically easier to understand and standardize.
A scalable department color coding scheme (few colors, consistent meaning)
Department color coding works best when it’s restrained. A scheme that scales across buildings or campuses should rely on a small, approved palette with consistent meaning everywhere the badge is used. The more shades you add (and the more exceptions you allow), the harder it becomes to learn—and the easier it becomes to misread under printing or lighting differences.
A practical blueprint is to start with the few departments that people need to recognize quickly (not every internal team), then reserve special colors for universal concepts that should mean the same thing in every location—like “Visitor” or “Contractor.” Keep those reserved concepts stable over time so staff don’t have to relearn the system.
- Limit the palette to a small set that people can memorize.
- Use one color per department category, not multiple shades for sub-teams.
- Keep assignments consistent across sites (blue should not mean IT in one building and Facilities in another).
- Reserve universal colors for cross-site concepts (e.g., Visitor, Contractor) and don’t reuse them for departments.
- Pair every color with a plain-language label and a simple icon for redundancy.
This “keep it simple and validate it” approach aligns with research on visual encoding and usability: as systems add categories and complexity, recognition and decision-making can degrade unless the design is carefully constrained and tested (source). In other words, a badge system is clearer when it avoids unnecessary levels and stays consistent.
“We stopped trying to color-code every team. Once we moved to a small set of department colors plus clear labels, people started using the badges as intended—at a glance.” – Facilities Coordinator

If someone can’t explain your department colors in one sentence, the system is probably too complex to be reliable in a hallway.
Color + label + icon: the clearest pattern for real-world badges
The most durable pattern for real workplaces is redundancy: color as a secondary cue, paired with a role/department label and a simple icon. When one cue fails (glare, distance, color ambiguity), the other cues still carry the meaning. This is where badge design becomes less about “pretty” and more about dependable recognition.
A clear hierarchy helps people find the right information quickly. The person’s name should be the primary element for most staff IDs and name tags. If you use photos, they should be large enough to support quick confirmation (not tiny thumbnails). The organization or site identifier should be stable and easy to find, especially in shared campuses.
- Primary: Person’s name (largest text), plus photo when needed for verification
- Secondary: Department/role label in plain language (e.g., “IT Support,” “Nursing,” “Facilities”)
- Support cue: Department color band/stripe
- Redundant cue: Simple icon (e.g., wrench for Facilities, shield for Security, headset for Support)
Accessibility is not a special feature—it’s basic reliability. Some people will not distinguish red/green well, and many environments introduce uneven lighting (bright windows, dim hallways, night shifts). A label and icon ensure the badge still communicates the correct department color coding even when color is unclear.
Use a simple, universally recognizable shape with strong contrast (one color, no fine detail). The goal is fast recognition, not decoration.
Print a few samples and check them where they’ll be worn: under your lighting, in holders, at typical distances (3–6 feet). Ask someone unfamiliar with the design what they think each badge means.
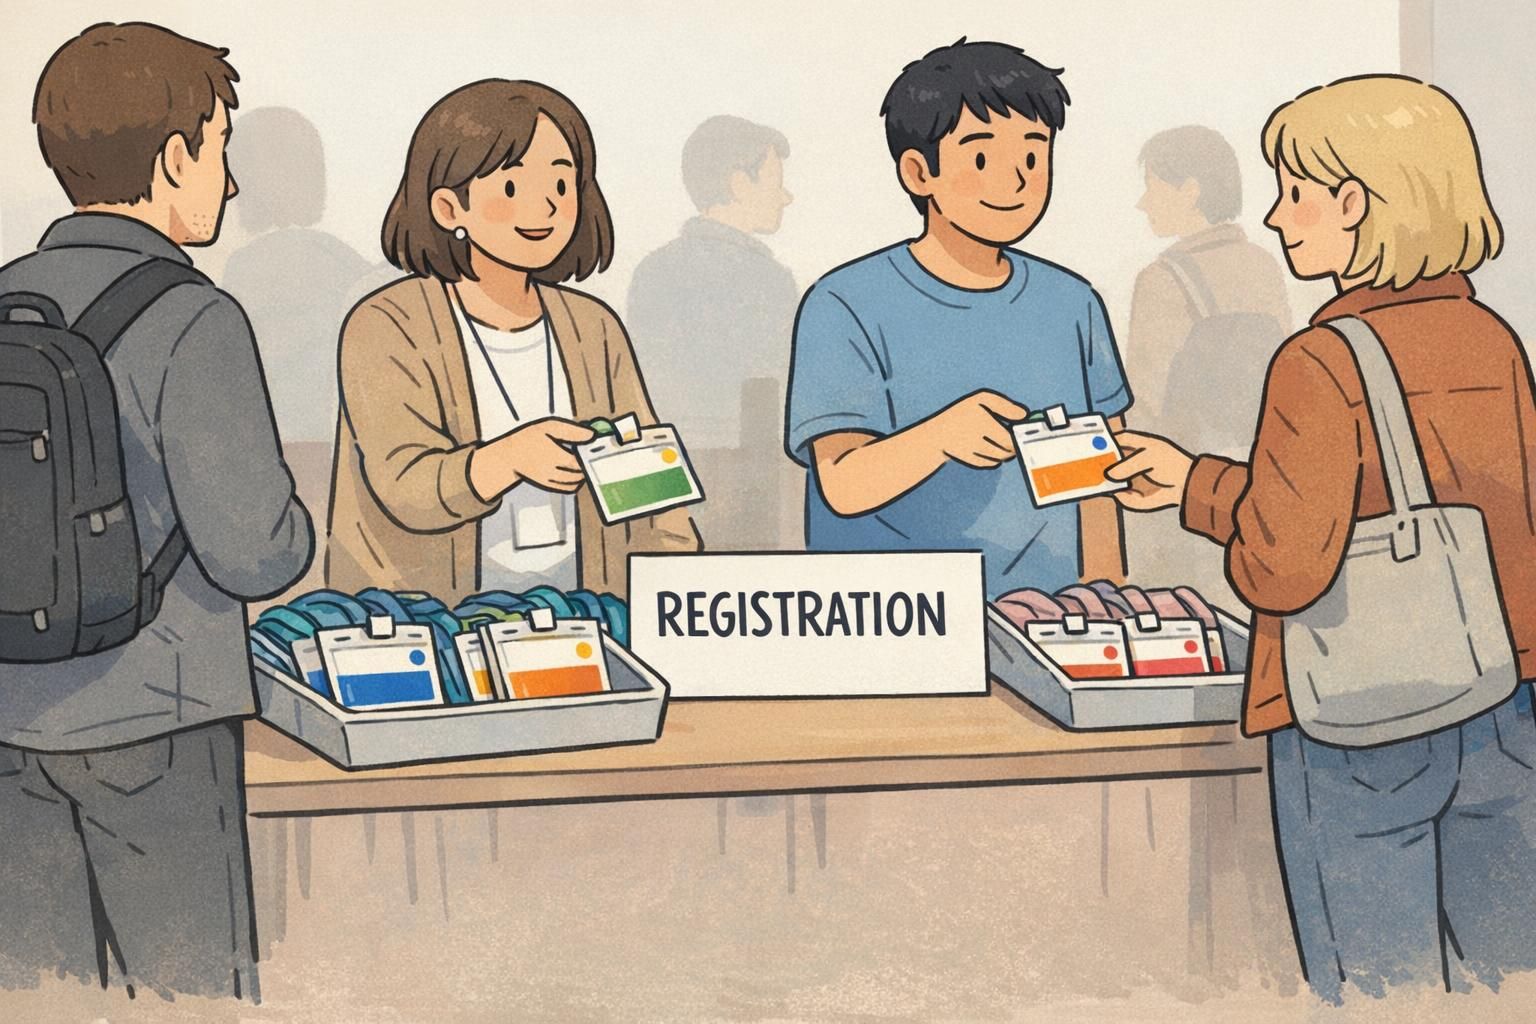
Applying color across badge types: staff IDs, name tags, and event badges
Color systems often break when they’re copied from one badge type to another without adjusting for use. Staff IDs, name tags, and event badges are worn differently, viewed at different distances, and used for different decisions. Your best results come from keeping the same meaning for colors, but adjusting layout emphasis based on the badge’s job.
Staff ID cards are long-lived and should prioritize durability and standardization. Keep the department color coding in a stable location (like a header or side stripe) so replacements look the same. Maintain a consistent hierarchy: name and photo first, role label next, color as support.
Name tags usually need bigger names and fewer details. People tend to glance at name tags during introductions, so a clean layout with a large name and a simple role band is typically more effective than cramming in multiple cues. If you add color, keep it controlled—one stripe or header is plenty.
Event badges are about wayfinding and fast sorting: attendees need to find the right room, line, or help desk quickly. A larger color band can be appropriate here, especially for tracks or attendee types. Still, keep a readable label and (if useful) an icon so meaning doesn’t collapse when badges flip, wrinkle, or sit behind glossy holders.
- Staff IDs: stable layout, durable materials, consistent department colors over time
- Name tags: larger names, simplified role cue, minimal color use to protect readability
- Event badges: stronger visual sorting (track/type), but keep labels/icons for clarity
For multi-day or multi-track events, avoid turning the badge into a rainbow of competing signals. A practical approach is to keep one stable band for the main category (for example, a department or track), then add a small secondary indicator for the day or access level—like a corner dot or small stripe. This reduces confusion because the primary meaning stays in one predictable place.
Across all badge types, keep the meaning of each color consistent. Change the layout emphasis—not the semantics.
Production details that keep color consistent (print, materials, and layout)
Even a strong badge design can drift if production is inconsistent. Printers vary, colors shift across batches, and materials change how inks look. A blue that feels “deep” on one run may print closer to purple on another, especially if different printers or settings are used across departments.
To protect clarity, define a small approved palette and document simple layout rules: where the color band goes, how large it must be to remain visible, and which areas must stay clear for the name and photo. The more your system relies on subtle shades or tight tolerances, the more it will suffer in day-to-day production.
- Approve a small set of exact colors and don’t allow “close enough” substitutes.
- Set minimum sizes for headers/stripes so the color cue is visible from a few feet away.
- Keep the name area on a clean, light field to preserve contrast under glare.
- Avoid putting critical text on mid-tone colors that may shift in print.
- Run a quick in-context review: print, laminate, place in holder, and view under real lighting before full rollout.
Material choices matter, too. A glossy surface can make colors look more saturated but can introduce reflections; a matte/silk finish can improve readability by reducing glare. Whatever you choose, keep it consistent across departments so your department color coding remains trustworthy and the badge doesn’t look like it “means something else” simply because it was produced differently.
Clear laminates and holders can change perceived contrast through reflections and slight color shifts. That’s why it’s important to test a printed-and-finished sample, not just a screen preview.
Using BadgeZoo templates and accessories to standardize color systems
Standardization is what makes a color system feel “obvious” to the people who rely on it. When multiple teams create their own versions of a badge, small layout changes accumulate: stripes move, colors shift, labels shrink, and suddenly the system is harder to scan.
Using shared templates helps keep badge design consistent, especially when departments issue their own IDs or when you need a matching family of staff IDs, name tags, badge buddies, and event badges. A repeatable kit approach—one layout per badge type, one approved palette, one set of placement rules—reduces the chance of improvisation and makes replacements straightforward.
Accessories also affect whether the system stays readable in practice. Consistent holders, clips, reels, and lanyards keep badges oriented correctly and visible rather than flipped or tucked away. If your environment needs extra visual separation (for example, temporary visitors), badge buddies or more prominent holders can add emphasis without forcing you to redesign the core card.
If you’re building or updating a standardized set, BadgeZoo supports producing consistent ID cards and related formats, and you can coordinate custom needs or questions through http://badgezoo.com/contact.
The best systems are boring on purpose: consistent templates, consistent colors, consistent placement—so people can focus on the person, not decode the badge.